Showing posts with label diy. Show all posts

Printable Wedding Planning Checklist for DIY Brides

We know planning your own wedding can be a little overwhelming, especially in the beginning.  Where do you start? Who do you call first?  When a wedding planner just isn't in the budget, what is a DIY bride to do?  Lucky for you, we've been in the industry long enough to know the answers to all your wedding planning questions.  To make it easy, we've put together this comprehensive wedding planning checklist which includes a countdown to your big day listing all the most important duties to tackle before you walk down the alter.  We hope you love it! Feel free to download, save to your computer, print, and check off your to-dos as needed.

Click here to download the FREE editable wedding planning checklist


System Requirements: You will need Adobe Acrobat or Adobe Reader, version 7.0.5 or later.  If you don't have either, Adobe Reader is available for free at adobe.com.  Once you have downloaded Adobe Acrobat or Adobe Reader software, you will be able to save this checklist to your computer for easy access to your to-do's and contacts. Not available for resale or redistribution.

DIY Ombre Dipped Taper Candle Centerpieces

We can't get enough of candlelit receptions, and are always looking for new creative spins on classic wedding decorations - so imagine our delight when we discovered candle dipping! Using only a few supplies, we were able to create gorgeous centerpiece decorations that would be perfect for a spring wedding, or could be altered slightly to work for any wedding theme. 

DIY Ombre Dipped Taper Candle Centerpieces

Spend an afternoon dipping candles in colored wax with our step-by-step instructions below to create a one-of-a-kind look to wow your guests. You may want to gather a few friends or family members to help with this project, but we promise you'll love the results.  When you set up your fabulous reception tables, you'll be so glad you took the time to make these gorgeous decorations.

DIY Ombre Dipped Taper Candle Centerpieces

Supplies:

  • Assorted Taper Candles
  • Wax Beads or Flakes (We used Natural Soy 444 Wax from Amazon)
  • Crayons
  • Crock Pot
  • Mason Jars
  • Wooden Spoons or Wooden Craft Sticks
  • Water

DIY Ombre Dipped Taper Candle Centerpieces

Instructions:

Set up and plug in your crock pot. We turned ours on High. Place several mason jars inside your crock pot, each firmly sitting upright. 

DIY Ombre Dipped Taper Candle Centerpieces

Add wax to each mason jar, filling to the top, but not overflowing. 

Add water to the crock pot. You will want to add as much water as you can without spilling into the jars or over the sides of the crock pot. The more water you have, the faster your wax will melt. Tip: The reason we do this after adding the wax is that you do not want your jars just floating around in the water - and the wax adds the weight you need to keep them anchored.

DIY Ombre Dipped Taper Candle Centerpieces

As the wax melts, you will need to add more until you have enough melted wax to fill the jars almost all the way to the top - leave about an inch to an inch and a half at the top to avoid overflowing when the tapers are dipped. We ended up using about a pound of wax per color, but it will vary based on the number of candles dipped, as you may need to replenish the wax in the jars if you dip quite a few. 

While you are waiting on the wax to melt - which could take a while depending on the type of wax you choose and the amount you are melting - you will need to get your crayons ready. 

DIY Ombre Dipped Taper Candle Centerpieces

Shave about 1/2 to 3/4 of each crayon to add to each jar of wax. Shaving the crayons instead of chopping them cuts down on the melting time. We recommend using individual sheets of wax paper for each color to avoid making a mess. Lay down a sheet of wax paper and make small shavings with a paring knife.

DIY Ombre Dipped Taper Candle Centerpieces

When you are done, lift the wax paper with the crayon shavings inside and use the wax paper to pour the crayon pieces into each jar.

DIY Ombre Dipped Taper Candle Centerpieces

Stir each jar to ensure all wax is melted and the crayon is evenly mixed throughout. 

At this point, dip a test taper candle in each jar to ensure the color is what you wanted. If it is not as bright as you want, adjust by adding more crayon. If you want to change the hue, add a different color to balance it out. Keep in mind that if you are wanting an ombre effect, you will want a lighter result. That way, when dipped multiple times the color will intensify.

Once you are satisfied with the color, remove the jars from the crock pot and place on a heat-resistant surface. The jars will be hot, so we suggest using a towel or oven mitts when moving them. (The reason for this is that when the wax is so hot, it does not adhere well to the candles - it is best to let it cool a little bit.)

Leave the crock pot on with the water inside in case your wax begins to harden. If the wax begins to harden, place the jar back inside the crock pot until it is fully melted again.

DIY Ombre Dipped Taper Candle Centerpieces

Slowly dip your candles. 

For an ombre look, lower the candle as deep in the wax as possible (you may need to tilt the jar on an angle to dip it deeper, but do this cautiously) and hold for 5-10 seconds before removing. 

Hold the candle out of the wax for 10-20 seconds to allow the colored wax to set. The wax may drip from the bottom of the candle a bit, so make sure to hold it over the jar. 

Dip the candle into the jar again, but do not dip as deep as the first time. Stop about a half inch to an inch below the last dip line. Hold in the wax for 5-10 seconds and then remove for about 10-20 seconds before dipping again. 

Repeat these steps, dipping less of the candle each time until you achieve the desired look. 

Hold for about a minute to allow the colored wax more time to set. 

While the wax is pliable, use your fingers to remove some wax from the base (about an inch at the bottom of the taper candle) so that the candle will fit into the holders you plan to use. It is easy to remove some of the wax in this area at this point and once removed, you can smooth out the wax remaining with your fingers.

Set down to cool. Tip: Use a baking dish with a raised edge. Set the base down in the pan, and prop the top on the edge of the dish so that your candles are not drying on a flat surface.

Repeat with each candle in the color assortment of your choice.

After you are finished, turn off and empty your crock pot.

Once cooled, store the candles - individually wrapped in plastic wrap - in a cool, dry place away from any heat sources until you are ready to use them.

Tip: With the unused wax, you could make small individual candles by placing a wick in a small jar, adding wax mixed with a few drops of essential oils, and allow to cool fully. Package these as gifts for your bridesmaids or to be handed out as favors at your bridal shower.  

DIY Ombre Dipped Taper Candle Centerpieces

We hope you enjoy making these beautiful ombre dipped taper candles as much as we did!

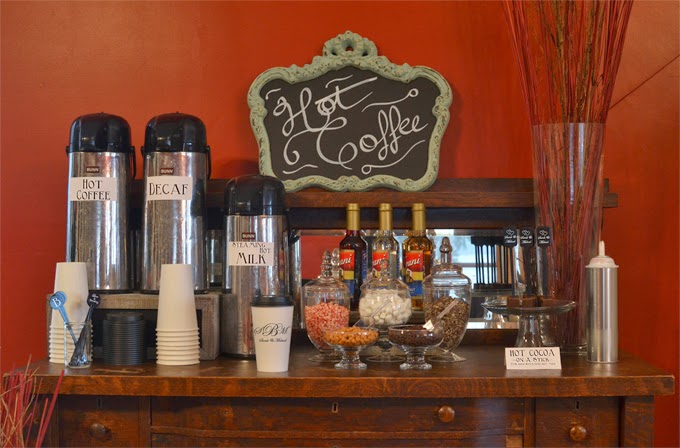
DIY Wedding Reception Coffee Station

DIY Wedding Reception Coffee Station

Brides and grooms do a lot to make sure guests have a great time on their wedding day, and one of our favorite ways of doing this is by setting up a great food and/or drink station. These stations ensure that guests have access to anything they need to keep the party going all night long. A coffee station is the perfect addition to your wedding reception - not only during the colder months, but all year long!

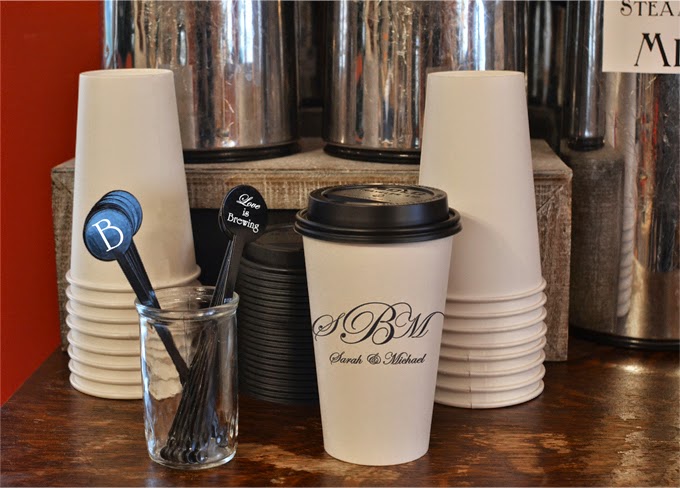
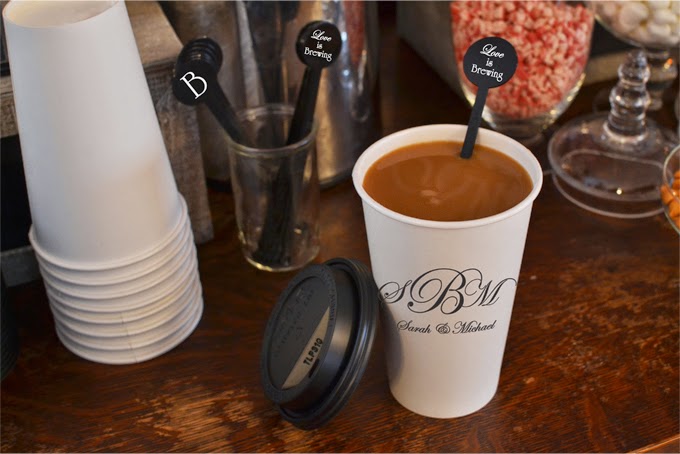
Consider creating a beautiful set-up with any goodies your guests may need to create a custom creation, and dress up your drink station with personalized coffee cups and swizzle sticks. Simple signs make for the perfect accents to your display, and are really easy to incorporate. With our tips and inspiration below, you will have a custom coffee station planned and set-up in no time!

DIY Wedding Reception Coffee Station

First, you'll want to choose a table or piece of furniture that has plenty of room for everything you want to include. We used an antique wooden buffet with a built-in mirror that is just beautiful, but you could use anything! Once you know how much room you will have to display all of your items, start to plan a list of everything you want to include.

Ideas: 
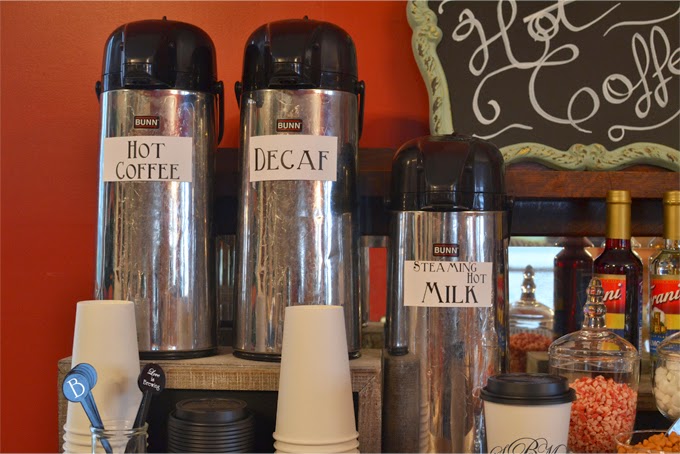
Coffee
Decaf Coffee
Hot Milk (to use with the hot cocoa on a stick)
Hot Water (to make hot cocoa or tea)
Tea Bags
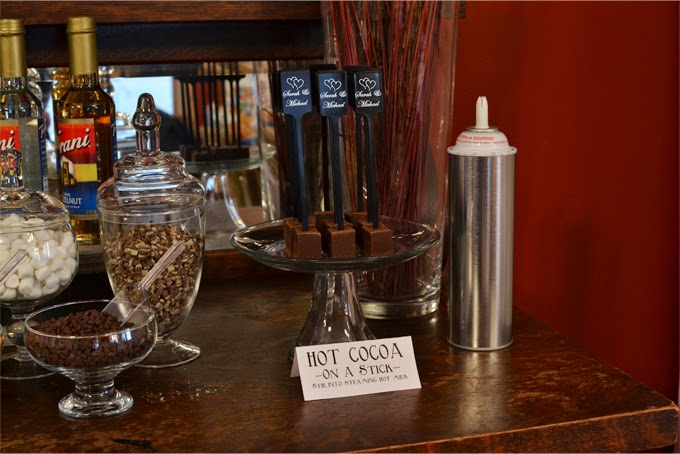
Hot Cocoa on a Stick (find the recipe here) or Powdered Hot Cocoa Mix
Whipped Cream
Creamer
Sugar
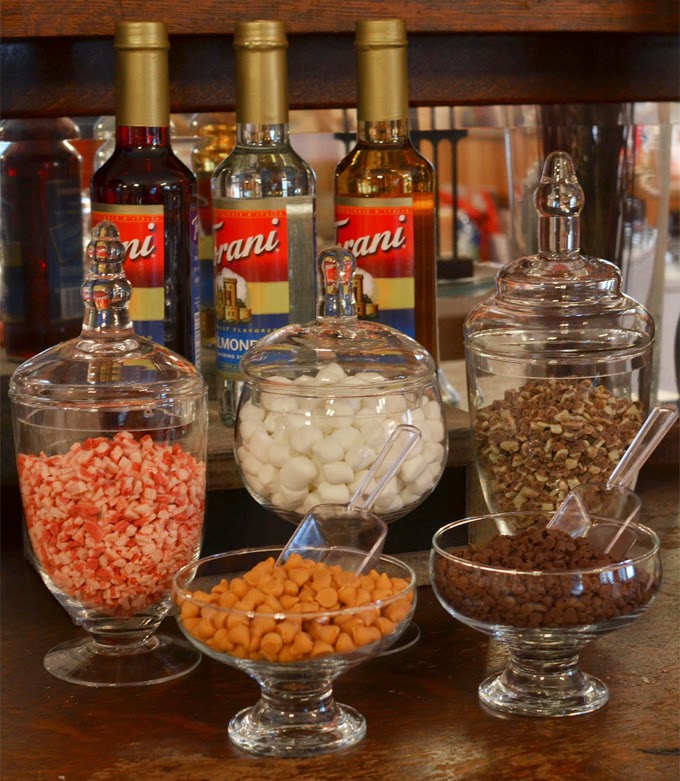
Marshmallows
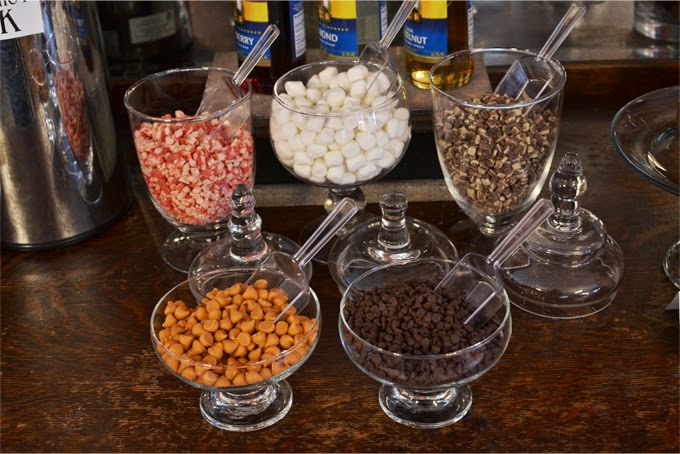
Crushed Candies - like peppermint and Andes mints
Chocolate Chips
Butterscotch Chips
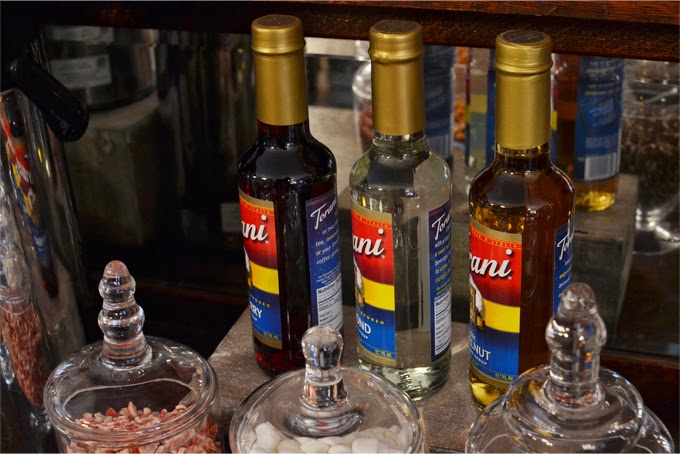
Flavoring Syrups (we used Raspberry, Almond, and Hazelnut flavors)

Don't Forget: 
Cute Signs
Personalized Coffee Cups with lids
Custom Printed Swizzle Sticks

DIY Wedding Reception Coffee Station

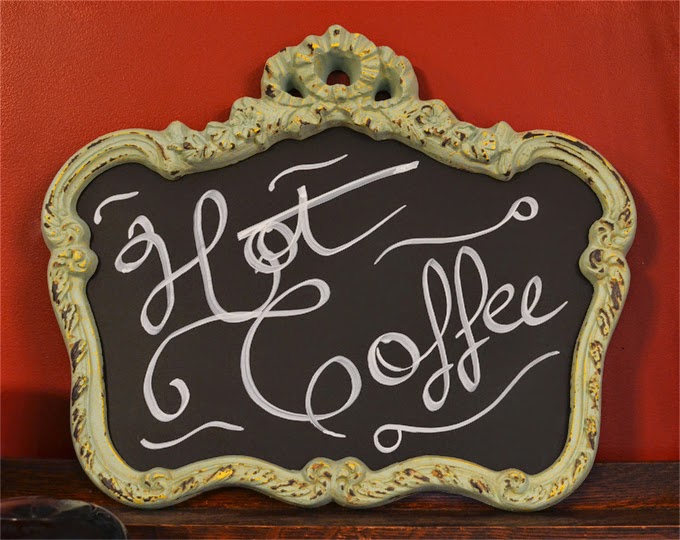
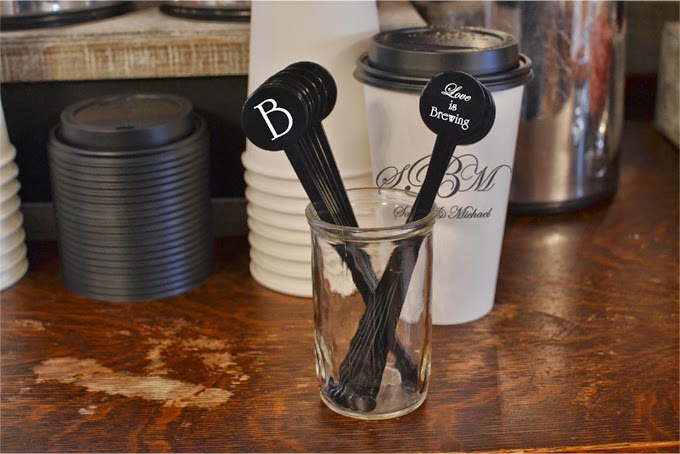
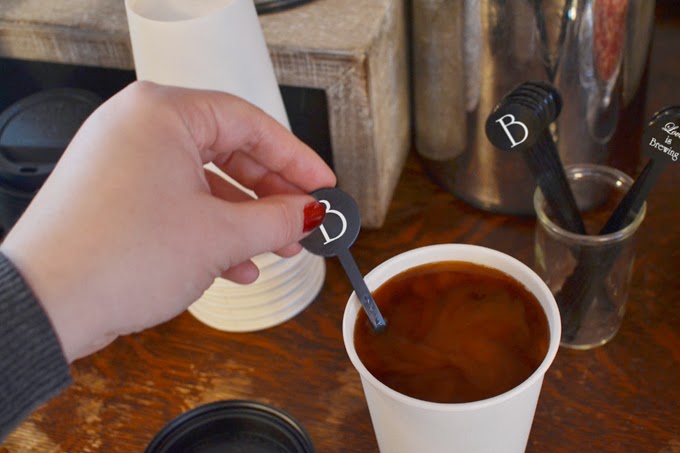
Make sure to personalize your coffee bar with decorations that tie into your event decor, and add custom touches like custom printed coffee cups and swizzle sticks personalized with a monogram or message. Chalkboard signs make great accessories for any drink station! We love the idea of a sweet message like 'Warm up here' or 'Baby it's cold outside' for a winter wedding, but we wanted to keep it simple with 'Hot Coffee' in large script lettering.

DIY Wedding Reception Coffee Station

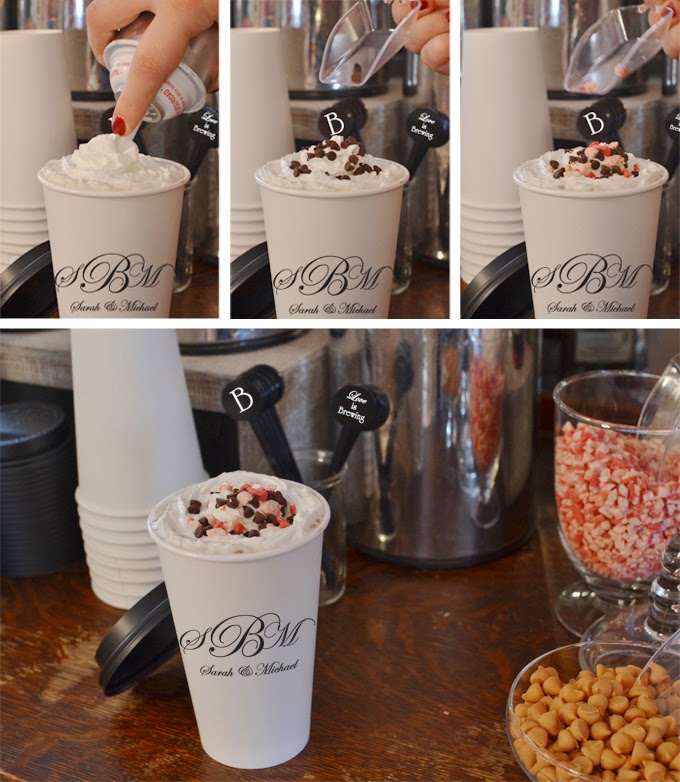
There are so many different options for toppings - so think outside the box for a truly unique display. Guests will love creating their own custom drinks at your fabulous coffee bar!

Custom DIY Hot Cocoa on a Stick Wedding Favors

Guests love favors that they can take home and enjoy in the days or weeks after your wedding, and we have just the thing! This recipe, adapted from King Arthur Flour, is easy to make – and oh-so-tasty! With only a handful of ingredients, these favors will be easy to make, and still look amazing. Package in clear boxes or cellophane bags tied with colorful twine and watch the child-like joy in your guests’ faces as they enjoy these sweet treats. You may want to leave some out at your coffee bar for guests to enjoy during your reception, because they are not going to want to wait to break into these.

Recipe for Hot Cocoa on a Stick
Yields 36 – 48 blocks (It all depends on how large you cut them)

Ingredients:
½ Cup Heavy Cream
14-Ounce Can Sweetened Condensed Milk (1 1/4 cups)
3 Cups Semisweet Chocolate (chopped chocolate bars or chips)
3/4 Cup Unsweetened Baking Chocolate
Plastic or Wooden Sticks (We used personalized swizzle sticks for a special touch!)

Hot Cocoa on a Stick Recipe and Tutorial

Line an 8" x 8" pan with parchment paper.
Heat the cream and condensed milk in a crock pot, on a low setting, until steaming – about 1-1.5 hours.  
We chose to use a crockpot so that we could work on some pretty packaging while the cream and condensed milk were warming. It also helped to keep the chocolate from burning, and keeps a nice even temperature throughout the entire process.
Once the cream and condensed milk are steaming, add both the semisweet and unsweetened chocolate. 

Hot Cocoa on a Stick Recipe and Tutorial

Stir gently to mix and cover the crockpot. Allow the chocolate to gradually melt with the lid on for about 10 minutes. 

Hot Cocoa on a Stick Recipe and Tutorial

Remove the lid and whisk vigorously until the chocolate has melted completely and the mixture is thick and shiny. 
Pour the chocolate mixture into the pan lined with parchment paper. Shake the pan gently to level. Set aside overnight to slowly set up, and then pop in the fridge for a bit to firm up before cutting. (If you want yours to set up more quickly, place in the refrigerator for a few hours until firm.)

Hot Cocoa on a Stick Recipe and Tutorial

Lift out of the pan using the parchment paper, and then turn out onto a clean cutting surface.
Cut off any rough edges to get make sure all of your cubes are smooth. Slice into ½” cubes. (You will need 2-3 blocks for each mug of milk at this size, but they melt more easily than larger cubes. If you would rather just cut them larger, that works too!) Heat a knife in hot water and wipe dry before each cut for smoothest cuts.
Stick a plastic or wooden stir stick into the center of each block.

Hot Cocoa on a Stick Recipe and Tutorial

Swirl into steaming hot milk – make sure it is steaming!
Add marshmallows if desired. Enjoy!

Hot Cocoa on a Stick Recipe and Tutorial

If you're feeling adventurous, we love these variations:
While the chocolate is melting, add a few drops of flavoring oil if you like; hazelnut, coffee, and vanilla are popular flavors.
Once you pour the mixture into the pan and smooth it out, sprinkle with cocoa powder.
After cut, roll in cocoa or crushed peppermint candy.
Add marshmallows to the top of each block using a dot of melted chocolate under each marshmallow, or add before your chocolate mixture sets up all the way.

Note: Hot cocoa on a stick will keep at room temperature for two weeks in an airtight container. If you are making them for your wedding and you want to keep them longer, put them in an airtight container and pop them in the fridge or in the freezer, where they will keep up to 30 days.

Speaking from experience, these are absolutely delicious - so much more smooth and creamy than powdered cocoa! You can also get really creative with your packaging! To order custom printed plastic or wooden swizzle sticks, click here.

DIY Doughnut Bar Real Wedding

Ana and Cliff were married on a gorgeous April day in Michigan.  Their outdoor wedding was held at the bride's parents' home which was a bit nerve wracking due to the crazy weather mother nature was laying down on Michigan the week before.  (If you know April in the Midwest, than enough said). But the weather pulled through and this outdoor DIY wedding was nothing short of spectacular.  You are not going to believe the amazing details put together by the bride and groom.  Hint: A mountain of Krispy Kreme doughnuts and a popcorn bar may make an appearance.  Of course all of this would not have been possible without the mad skills of Brandon Shafer Photography who helped bring it all to life.  Thanks for sharing!

DIY Doughnut Bar Real Wedding
DIY Doughnut Bar Real WeddingThe groom was dressed in casual denim and vintage tweed with a matching Polo bow tie.  Which was completely fitting for Cliff since he runs his own business selling unique vintage suits.  In fact, each groomsman rocked a different style vintage suit and shoes.  The biggest shocker yet...the men picked up all their attire for a steal at thrift stores and off Ebay.  Proof you can look dapper on a budget.

DIY Doughnut Bar Real WeddingAna and Cliff did a first look to share a special moment just between the two of them.  There is nothing more pure and romantic than when a bride and groom see each other for the first time on their wedding day.  Which makes this sweet moment just between the bride and groom even that more special.  And we have to say a "first look" before the ceremony is also a great way to shake off some wedding day jitters.

DIY Doughnut Bar Real Wedding
DIY Doughnut Bar Real WeddingWords cannot convey how in love we are with this guest book sign in area.  Asking guests to mark their favorite passage in your Bible is such a sweet idea for any Christian wedding.  How amazing would it be (even years after) to look back through your Bible to see what friends and family have highlighted for you.  Definitely a sentiment worth cherishing.

DIY Doughnut Bar Real Wedding
DIY Doughnut Bar Real WeddingThis Krispy Kreme doughnut bar is to die for! Doesn't it make your mouth water and your eye's glaze over in delight (pun intended).  Set out some personalized goodie bags for guests to fill up and take home as late night treats.

DIY Doughnut Bar Real Wedding
As if the doughnut bar wasn't enough! A popcorn bar complete with M&M's, roasted peanuts, and other delicious toppings also greeted guests.  The best of both worlds; sweet and savory to satisfy everyone's palette.  What an adorable addition to an absolutely perfect DIY wedding.

Photography: Brandon Shafer Photography / Ceremony Venue: Kentwood Community Church / Reception Venue: Bride's Parents' Home / DJ: Celebration Entertainment / Caterer: Adeline Leigh Catering / Tuxedos: Thrift Stores and Ebay / Wedding Dress: Bridal Gallery / Makeup: Brandis Baughman / Hair: Cody Fugate / Groom's Shoes: Thrift Store / Bride's Shoes: Davids Bridal
Hover to Pin
 
Related Posts Plugin for WordPress, Blogger...